

Home › Forums › Cannabis Cultivation › Organic: tips, tricks and tech
-
AuthorPosts
-
-
2022年 10月 14日 at am10:11 #5323
I was amazed when scrolling back through the 12 pages of posts that no one has started a thread about organic growing. Since I spent the morning elbow deep it various poop, teas and digging through soil and snapped a pic but there’s no where to post it, what better time to start a thread for all the grass loving hippies out there.
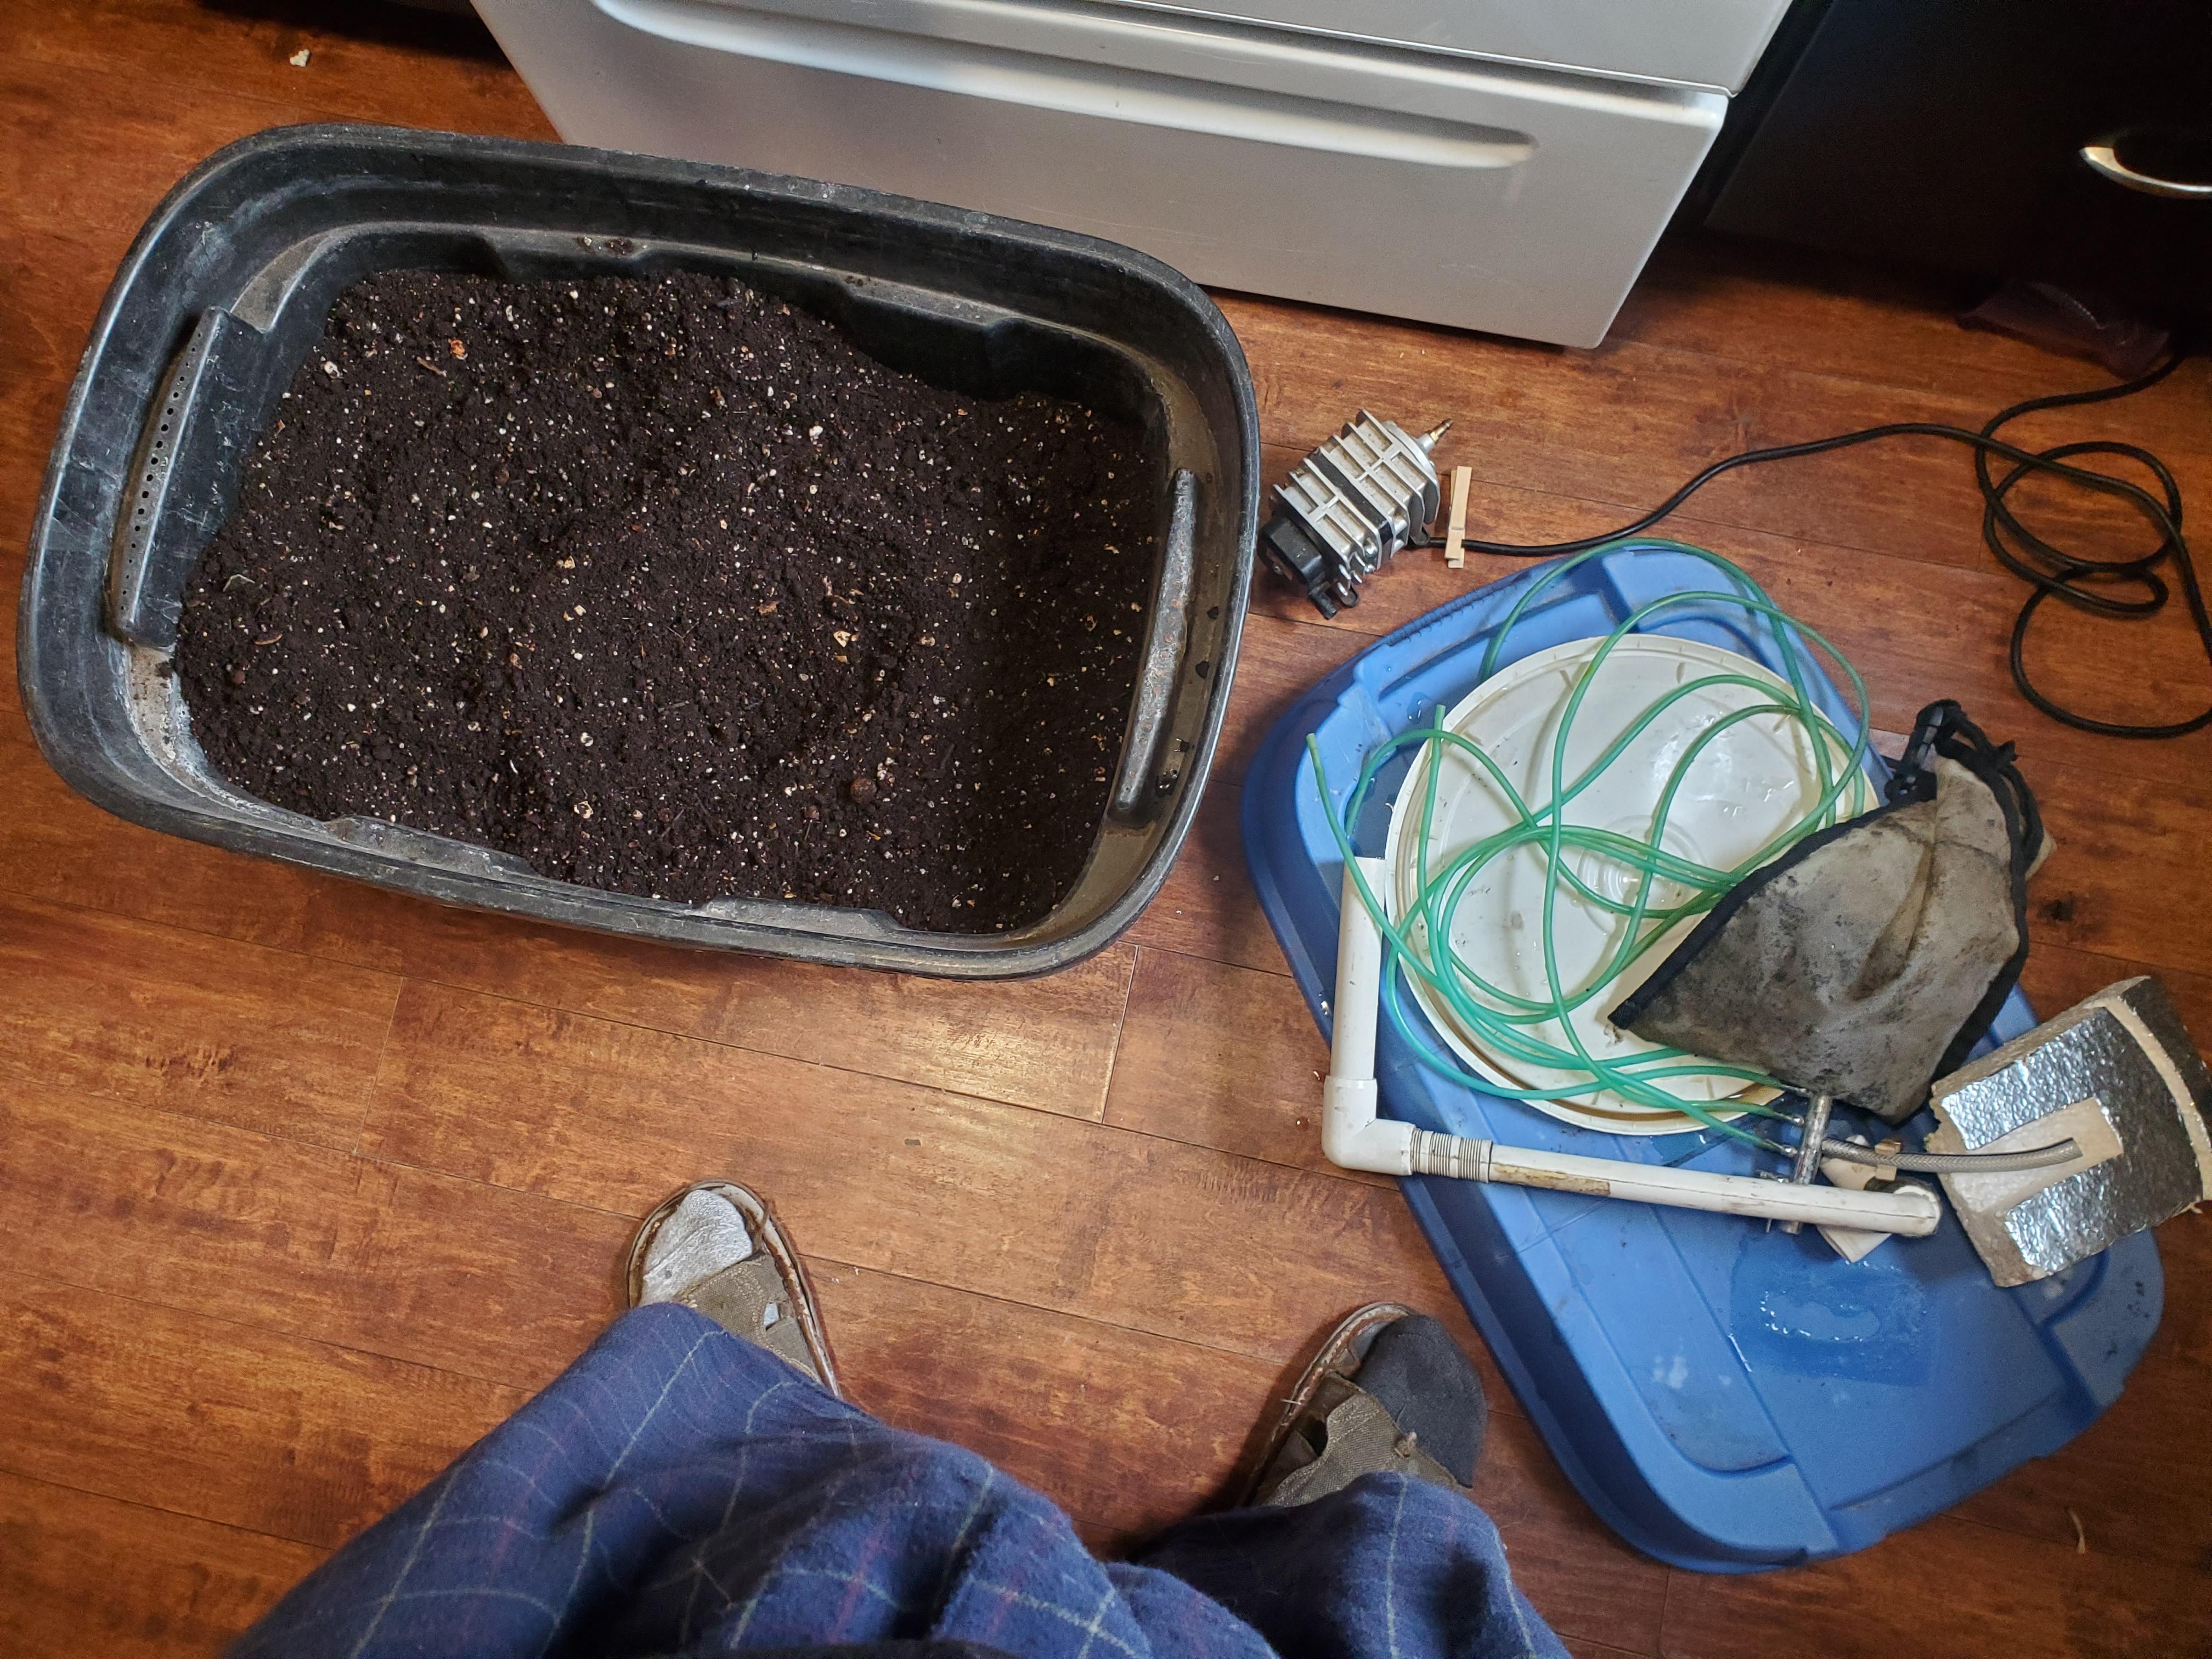
After dumping the last of my soil mix together indoors I had an empty tote to dump all my worm castings from my bins into, roughly 10gal worth. My old place had boskahi buckets for pre-composting fermentation which were dumped into 15gal tote worm farms. I highly recommend adding bokashi buckets for any worm farmers out there, so much easier being able to dump everything (citrus peels, alliums, meat waste, heavy oils, etc) into the worm bins without worrying about throwing the balance off.
My aerated compost brewer is sitting waiting to be sterilized before brewing up an alfalfa tea for veg next. I make what’s theoretically a balanced bacterial/fungal tea every couple weeks to make sure the soils filled with good microbes. One of these days I’ll pick up a microscope so I can check what’s actually in them.
I keep worms in my planters as well, I usually let the soil sit fallow for a couple weeks to a month between crops to give whatever amendments I add time to start breaking down. Although plants are giving supplemental nutes as needed, combining a fortified soil and nutes is an easy/lazy way to grow I find.
My biggest tip to any organic growers out there would be to consider sub irrigated planters as the easiest way to maintain soil moisture levels so those microbes thrive instead of getting knocked back as the soil dries.
How else is growing organic, either all out or in a blended system like mine? What are you using, any tips or tech you’ve picked up along the way? Recipes for brewing A.C.T.’s or LAB’s? Are you buying organic products or raw inputs and making them yourself?
-
2022年 10月 14日 at pm6:48 #5385
I started a compost pile this summer and have been adding to it. I was going to let it go from here and just break down. I’m still just overwhelmed at the amount of info on the subject. I mean it’s not more than any other topic but I read what you wrote and I’m thinking “god damn, I’m not even close to that with my little compost pile”. Does it matter what I’ve added to the pile as far as browns and greens go? For instance if I created a pile of of dead leaves and only kitchen scraps would it have a different nutrient composition than a pile made mostly out of grass clippings? Are all greens and browns the same? There’s so much I need to learn but if I could figure that out it would help to give me a base to work from. Thanks for making this thread and all the help.
-
2022年 10月 14日 at pm6:58 #5387
What you said about sub irrigated planters is interesting. The only method I have heard or read about was fabric pots in an inch of water. But i haven’t ever looked into it just came across that. I can look up different methods if i get into it though. What you say makes sense bc the soil drying out i would think would not be good for the beneficial microbes. Dry air is how you keep mold away. But how does that effect the roots? I read that the full wet to dry cycle allows the roots to get the oxygen they need. How does that work?
-
2022年 10月 14日 at pm8:03 #5398
I’m gonna answer this first because it’s easier as composting is an art in and of itself, easily as complicated as growing dope or processing concentrates and I am by no means an expert or even that highly educated about it but I’m happy to share what I know. First though SIP which I understand better as they are simpler.
So fabric pots in an inch of water is more bottom feeding and if left like that constantly would create anaerobic conditions which are good breeding grounds for various pathogens. SIP work by using a passive wick system to draw water into the growing medium from a reservoir below. There’s a couple variations on how to make them, earthbox’s are a popular commercially available version which just basically have net pots in two corners you pack tight with soil, that then wicks it up to the planter to replace the water lost through evapotranspiration.
As far as air in the rootzone it’s displaced when you water a pot as the water floods the soil and fills the air gaps, which is why you need to let it dry between watering’s to ensure air is drawn back into those spaces to avoid anaerobic conditions. With bottom feeding through a wick system those air spaces aren’t filled as the water simply moves by diffusion/capillary action to replace the water as it’s drawn out. That being said I do have more aeration in my soil mix with over 20% biochar on top of the soil mix already having rice hulls in it for proper aeration. I also prefer to use fabric pots over plastic planters again to aid with aeration as well as air prune the roots to prevent them getting root bound. There’s lots of DiY tutorials online, my simple solution was buying some fabric planters from amazon that are 32″x12″x8″ (roughly 2 cu ft, or 14 gals) that I have sitting it shallow tupperware on top of 4-6″ of hydroton with a capillary mat running down the center with both ends in the bottom of the container. I’ll keep the water full to just below the top of the hydroton and the capillary mat with do the rest. Although I may have to add some wicks going up into the planter to keep the soil evenly moist. That’s another project on the list, for now I just bottom water every couple days which just takes a bit more attention as I have to let them dry out enough instead of them sorting themselves out though science magic.
-
2022年 10月 14日 at pm8:12 #5402
I’ll have to look up what some of those products are too get a picture of what you’re talking about. But I understand what you’re saying about it just replacing the water as it’s drawn out. It’s never fully saturating the pot so the roots are always able to breath. I’m going to look up what this earthboxes are. That would help me get a better picture too. Thanks for the info.
-
2022年 10月 14日 at pm8:33 #5407
Think of soil as a matrix of structure and empty pockets filled with air and it makes perfect sense; when you water from above to saturation/run off all those spaces are filled and the soil is also compressed by the pressure/weight over time. Sub irrigation means the water moves up the soil but never fills the air pockets, so the roots/microbes have a consistent hydration level while the air isn’t disturbed.
-
-
2022年 10月 14日 at pm7:04 #5388
Sorry for bombing you like this but i gotta do it in parts. I go back and reread it and new questions come up. My compost pile is a lot of grass clippings. Not to much kitchen scraps anymore but at the beginning we were really vigilant about it and we got a lot in there. Plus my neighbor was pitching in. But now the piles mostly dirt and I added a large amount of grass clippings bc in not ready for the dirt yet so i figured I’ll keep it going. I was looking at worms on a website that ships them but i didn’t know if they’d be beneficial, considering it’s just grass clippings. I’ve seen a worm or 2 in there already, but not a lot.
-
2022年 10月 14日 at pm8:22 #5404
My favourite book about composting/organic gardening is “the Intelligent Gardener” by Steve Solomon, even though most of the organic community black listed/shunned him for writing it and suggesting organic systems are better with proper mineral inputs to ensure it’s properly balanced. To answer your questions as best I can, well keeping in mind this is only my limited understanding of the subject:
-what you put into compost very much matters, “greens” are high N sources, “browns” are high carbon; the carbon to nitrogen ratio directly affects how quickly the pile composts and the stability of the hummus created from that compost. Too much N and the pile is too active and the resulting compost is less stable/breaks down quicker, not to mention has more unstable nutrients like N off gas or P leach out as it’s highly water soluble.
-worm composting is generally done in bins or different controlled systems and a are a very easy way for anyone to compost and produce a high quality as the worms do all the work. All you need to do is maintain the right environment by adding bedding (torn up newspaper, used coco/peat, ect) to control the moisture and make sure the wormies have somewhere to rest, keep it from drying out (if it’s too hot or wet the worms will start trying to escape lol) and make sure the don’t have too much food at once. Bins are self regulating and will eventually stabalize to handle all your scraps but generally worms can only eat their weight in a day; so if you start with a 1/2lbs of reg wigglers you can only feed them 1/2lbs of scraps per day to start. The good news is their population size will double every 30 days roughly so in a short while there will be enough to plow through all the food you feed them. You also need to make sure you aren’t putting certain things in the bin like onions/garlic/leeks (aka alliums), cirtrus peels, meat or heavy greasy/oily foods as they take longer to break down or are hard for the worms to process. Small amounts irregularly aren’t a big deal but too much, too often will cause problems. Again, if there’s a worm exodus then you know somethings wrong.
-In your outdoor compost pile when you get it working you’ll find there’s a very active layer of worms at a certain depth where it’s not too hot for them, not too dry and there’s lots of rotted food for them to feast on the microbes. Building a proper pile is kinda complicated; you should really spend time collecting all the components and storing them separately until you are ready to build a pile 1 yard square at a minimum with alternating layers of brown, green and then a bit of dirt for microbes to inoculate it. It needs to be watered as it’s built up to make sure the moisture content is right, ideally your compost bin should be covered and in the shade so it’s not externally heated or dried out. The internal temps should be monitored as they tell you when it needs to be turned, which should be done regularly but not too often. There’s a whole art to it, which is why I took the easy root with earth worms and bokashi.
I hope that answers your questions but if not just ask away, always enjoy talking about rot, decay, death and rebirth. Composting is pretty epic when you think about it, not even getting into the microbial wars being fought. Totally metal when you think about it lol
-
2022年 10月 15日 at am5:17 #5478
That does help. Going to grab that book now.
-
2022年 10月 15日 at pm5:35 #5593
Always feel free to bombard away, when I read “the tipping point” by Malcolm Gladwell I instantly related to his description of ‘mavens’, people who enjoy collecting and disseminating info. Answering questions often forces me to learn more myself and reading other peoples replies can often bring a new perspective and way of understanding a topic deeper. It’s always a pleasure, so ask as many questions as often as you like so we all keep learning.
-
-
2022年 10月 14日 at pm8:19 #5403
I was watching a video on YouTube and the guy was doing a lasagna was what they were calling it he was layered everything and then placed Neem seeds on top of the casting and volcano rock kelp and etc they were also speaking well about bio char ,does anyone know anything about the bio char.They sure made a good showing and are making me think of buying all the different things like the kelp volcano rock and alot of other things I can’t remember right now but I believe you get it.Its a great video from TD and calijuana
-
2022年 10月 14日 at pm8:42 #5408
Biochar helps stabalize the microbial population which makes for better nutrient availability and more stable soil. It’s was discovered in the amazon originally and called Terra Preta (first soil) as it’s the only rich, deep soil beds in the amazon basin where the biological activity is so high there’s usually only a thin layer of soil as organic matter cycles through so quickly. Terra Preta was created by early tribes burning forests for fields and burying the charcoal in the soil. Which is all biochar is essentially; charcoal added to soil. Since then studies from Cornell and the UoG amoung others have shown that it’s incredibly effective at increasing soil fertility as well as stability. Since it can be easily made from most biomass as well as be used for co-generation of heat and energy it’s becoming very popular. Biochar generators create charcoal through combustion in a low oxygen enviroment (generating heat), which produces a lot of carbon monoxide. That can be collected/diverted into an engine/generator as carbon monoxide mixed with air is a low energy fuel creating carbon dioxide and water as byproduct; which are both usable in greenhouses making biochar generators ideal for greenhouse production in my opinion.
-
-
2022年 10月 15日 at am12:02 #5422
-
2022年 10月 15日 at am4:59 #5464
Glad it answered your question, biochar is an interesting additive but also widely misunderstood. Always happy to talk about it.
-
-
2022年 10月 15日 at am2:20 #5435
I use subcools improved recipe for my outdoor. This was my 2nd year so I’m not very knowledgeable about it yet but I definitely want to learn. I think my biggest problem is knowing how wet to keep the soil during cooking phase. Tje first year I got lots of white fuzz on the top of bags, buy 2nd year I didn’t get hardly any. I was pretty worried it wouldn’t work out but it seemed to do fine.
-
2022年 10月 15日 at am4:50 #5459
With subcools recipe you’re really just looking to keep the soil hydrated so the less available amendments like the rock dusts (which take as long as 3-6 months before really becoming available as a slow release additive) have time to start breaking down. You don’t want any run off as then the more water soluble ferts will be washed out but it’s more like a fortified soil then a true organic soil relying on decomposition of organic matter and microbes to make nutrients available. Hope that clears things up
-
2022年 10月 15日 at am9:36 #5520
O I ment as it cooks back I’m the bags I got the soil in. I was dumping and mixing once a week. The first year I tried it the mycelium would build ontop when I opened the bags to mix, but it was like it wouldn’t take off or something. The bags were really heavy the first year so I figured I wet it down to much.
-
2022年 10月 15日 at pm5:38 #5594
What do you mean by “the mycelium would build ontop when I opened the bags to mix, but it was like it wouldn’t take off or something.”? Were you expecting it to fruit and grow mushrooms? If you were seeing mycelium that means it was doing it’s thing (whichever type of fungi it was of course).
-
2022年 10月 15日 at pm5:47 #5597
No I know it’s a good thing, sorry if my post is confusing lol.
What I mean is the first year I did it I saw alot of it when i opend the bags to mix it up the next week, but i dont know how much water was enough so I put quite alot. The recipe says to wet it, but not soaked. And I thought I might of wet it to much my first year doing this because the bags were extremely heavy.
So the next year, this season I wet it less and didn’t see as much. I suppose I’m sorta answering my own question a bit.
I’d like to know how much you would wet it? How would you determine how much is enough? The bags of soil I got were pretty dry to begin with, which I think helped me some to mix the ingredients dry. But then I basically wet it till it clumped but no water would squeeze out.
-
2022年 10月 15日 at pm6:42 #5615
Ok, that makes more sense. Just so I’m clear, I assume you mixed up new soil this year following the same recipe as last year but didn’t see the same results and weren’t reusing the old soil from last year right? If that’s correct then you are probably right, didn’t have enough moisture to keep the fungi happy, which is why you didn’t see the same mycelium form.
I would treat it the same as a compost pile, soak it until when you squeeze a ball in your hand you just see a bit of water come out, you don’t want it dripping down your arm or anything. When squeezed into a ball the ideal soil at saturation will have some water coming out between your fingers when squeezed, hold it’s shape when released and break apart into clumps when poked. Hope that finally answers your question now that I understand what you were saying.
-
2022年 10月 15日 at pm6:46 #5621
Yes thank you once again. Sorry for the confusion ✌️
-
2022年 10月 15日 at pm7:46 #5648
The problem was equally my fault as communication is a two way street and I’d be a dick if I laid all the blame on you. I’m an asshole, probably a bit too proudly lol, but not a dick…
-
-
-
AuthorPosts
You must be logged in to reply to this topic.